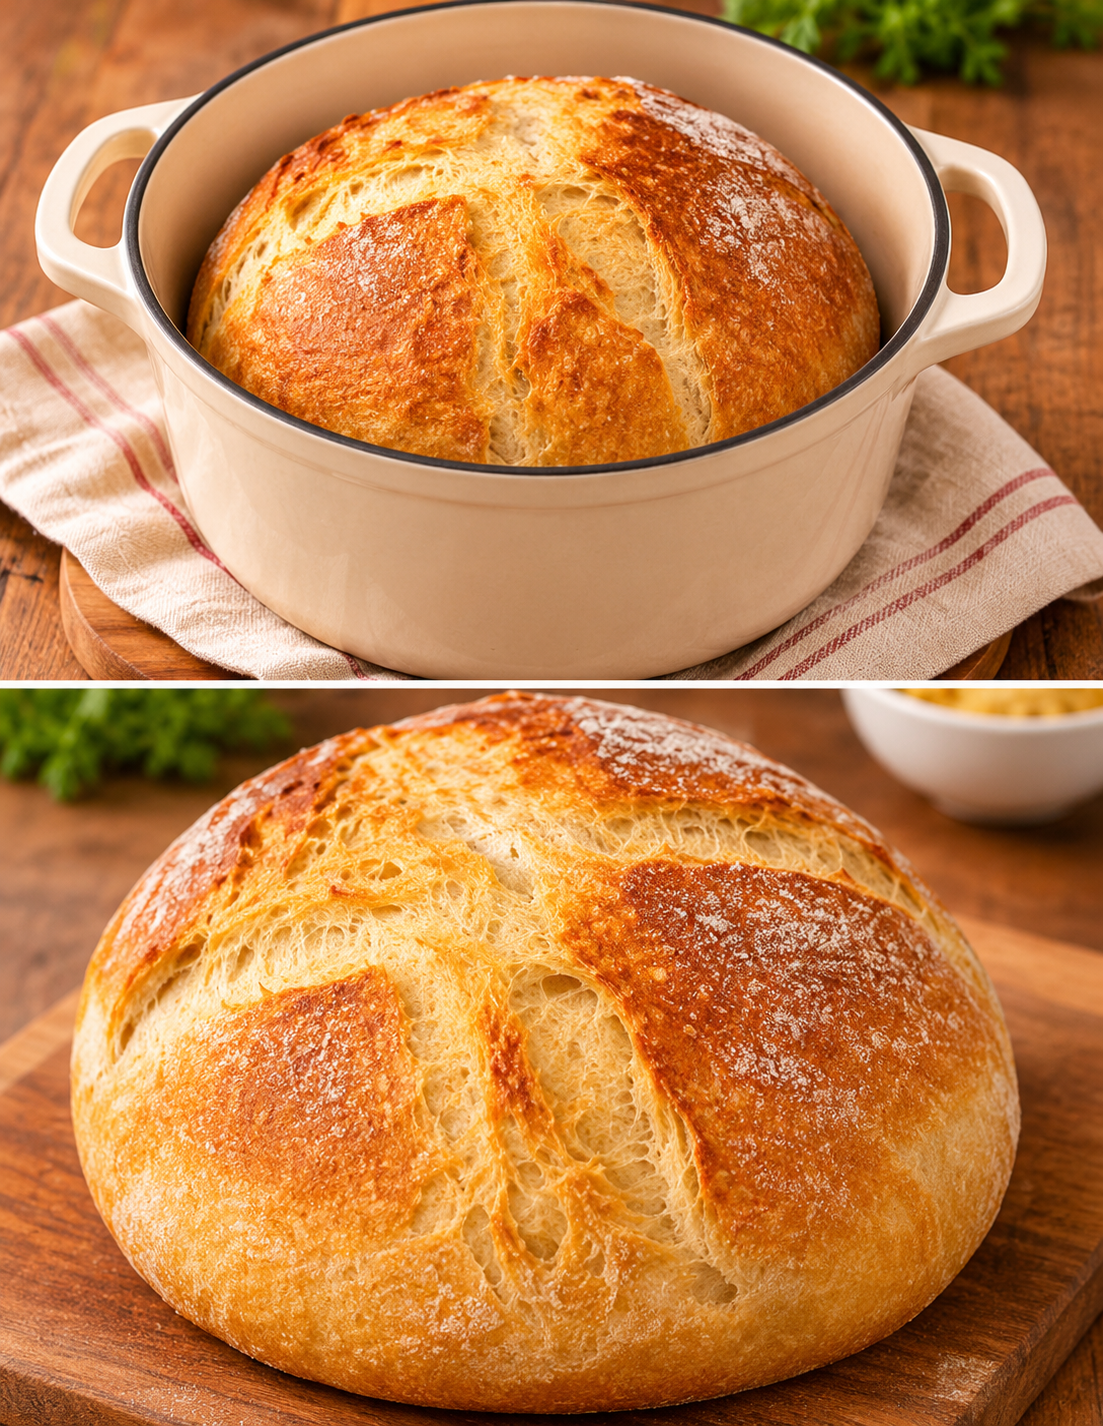
No-Knead Dutch Oven Crusty Artisan Bread – Easy, Golden & Delicious Homemade Bread
Description
No-Knead Artisan Bread is a delicious homemade bread with a beautifully golden, crackly crust and a soft, airy interior. Made with just four basic ingredients, this rustic loaf delivers bakery-style flavor without complicated techniques, special baking skills, or an electric mixer.
The secret to perfect No-Knead Artisan Bread is a long, slow fermentation. Instead of kneading the dough, you simply combine flour, water, yeast, and salt, then allow the mixture to rest. During this time, the dough develops gluten naturally, creating a chewy texture and wonderful flavor.
Baking in a preheated Dutch oven makes a remarkable difference. The covered pot traps moisture released by the dough, helping the loaf expand before its crust sets. Removing the lid during the final baking stage creates the irresistible golden exterior.
This No-Knead Artisan Bread is perfect for sandwiches, soups, family dinners, and weekend baking. Serve it warm with butter, olive oil, or your favorite homemade spread.
With minimal hands-on preparation and reliable baking techniques, this recipe makes rustic homemade bread approachable for beginners.
Servings and Timing
Makes: 1 large loaf
Prep Time: 10–15 minutes
Rise Time: 12–18 hours
Bake Time: 45–50 minutes
Total Time: About 13–19 hours
Ingredients
For the Artisan Bread
-
3 cups (360g) all-purpose flour
-
1½ cups (355ml) lukewarm water
-
1½ teaspoons fine sea salt
-
¼ teaspoon instant yeast
For Handling the Dough
-
2 tablespoons all-purpose flour, for dusting
-
Parchment paper suitable for high-temperature baking
Optional Serving Ingredients
-
Unsalted butter
-
Extra-virgin olive oil
-
Fresh rosemary
-
Garlic butter
-
Flaky sea salt
Instructions
Step 1: Prepare the Ingredients
Measure the flour, water, salt, and instant yeast.
For the most consistent results, use a kitchen scale.
The water should feel slightly warm, not hot. Room-temperature water also works well for the long fermentation.
Accurate measurements help No-Knead Artisan Bread develop the correct dough consistency.
Step 2: Combine the Dry Ingredients
Place the flour in a large mixing bowl.
Add the salt and instant yeast.
Stir thoroughly using a wooden spoon.
Make sure the yeast and salt are evenly distributed throughout the flour.
Step 3: Add the Water
Pour the water into the flour mixture.
Stir with a sturdy spoon until no dry flour remains.
The dough should look rough, sticky, and slightly shaggy.
Avoid adding excessive flour because this recipe requires a relatively wet dough.
Step 4: Cover the Dough
Cover the bowl securely with plastic wrap or a fitted lid.
Leave enough room for the dough to expand.
Do not knead the mixture.
The long resting period allows No-Knead Artisan Bread to develop its structure naturally.
Step 5: Allow the First Rise
Leave the covered bowl at room temperature for approximately 12–18 hours.
A moderately cool room, around 68–72°F (20–22°C), is ideal.
The dough should become bubbly, expanded, and slightly domed.
It may nearly double in volume.
If your kitchen is particularly warm, check the dough earlier because fermentation happens faster.
Step 6: Prepare the Work Surface
Lightly flour a clean countertop.
Carefully turn the fermented dough onto the surface using a spatula.
The dough will be sticky and full of air bubbles.
Handle it gently to preserve its airy structure.
Step 7: Shape the Dough
With lightly floured hands, fold the edges of the dough toward the center.
Repeat around the dough until a loose ball forms.
Turn it seam-side down and gently tighten its surface.
Avoid aggressive kneading or excessive handling.
This shaping technique helps No-Knead Artisan Bread rise into a beautiful round loaf.
Step 8: Prepare the Second Rise
Place the shaped dough on a sheet of parchment paper.
Cover loosely with a clean kitchen towel.
Allow it to rest for approximately 45–60 minutes.
The dough should become slightly puffier without losing its shape completely.
Step 9: Preheat the Dutch Oven
About 30 minutes before baking, place a 5–6-quart oven-safe Dutch oven with its lid inside the oven.
Preheat to 450°F (230°C).
Ensure the Dutch oven and lid are rated for this temperature.
A thoroughly heated pot helps create the crisp crust associated with No-Knead Artisan Bread.
Step 10: Score the Dough
Once the dough has finished resting, lightly dust its surface with flour.
Use a sharp knife or bread lame to make a shallow slash across the top.
Scoring helps the bread expand in a controlled direction while baking.
Step 11: Transfer to the Dutch Oven
Carefully remove the hot Dutch oven from the oven.
Using the parchment paper as a sling, lower the shaped dough into the pot.
Keep your hands away from the hot sides.
Place the lid back on securely.
Step 12: Bake Covered
Return the covered Dutch oven to the oven.
Bake for approximately 30 minutes.
During this stage, trapped steam encourages oven spring and delays crust formation.
The loaf should expand significantly.
Step 13: Bake Until Golden
Carefully remove the lid.
Continue baking for another 10–15 minutes until the crust becomes deeply golden brown.
The center should reach approximately 200–210°F (93–99°C).
Avoid excessive baking because it may dry out the interior.
Step 14: Cool Before Slicing
Remove the finished No-Knead Artisan Bread from the Dutch oven.
Transfer it to a wire cooling rack.
Allow it to cool for at least one hour.
Cooling helps the interior finish setting and prevents a gummy texture.
Slice using a serrated bread knife and serve.
Tips for the Best No-Knead Artisan Bread
Measure Flour Accurately
Using too much flour creates a stiff dough and dense bread. Weighing flour provides reliable results.
Allow Proper Fermentation
The long first rise develops flavor and structure. Watch the dough rather than relying only on the clock.
Keep the Dough Slightly Sticky
This recipe uses a wet dough to create an airy interior.
Avoid Overhandling
Gentle folding preserves the air bubbles created during fermentation.
Preheat the Dutch Oven
A hot pot encourages rapid expansion and a beautifully crisp exterior.
Use Suitable Parchment
Choose parchment rated for the baking temperature, or follow a safe transfer method recommended by your cookware manufacturer.
Bake Until Deeply Golden
The rich brown color contributes to the toasted flavor of No-Knead Artisan Bread.
Cool Completely
Allowing the loaf to cool improves slicing and helps maintain its interior texture.
Variations
Rosemary Garlic Artisan Bread
Add one tablespoon finely chopped rosemary and two minced garlic cloves to the dough.
Whole-Wheat Artisan Bread
Replace one cup of all-purpose flour with whole-wheat flour.
Add a little extra water if necessary because whole-wheat flour absorbs more moisture.
Olive Artisan Bread
Fold ½ cup chopped, well-drained Kalamata olives into the dough before shaping.
Cheddar Artisan Bread
Add ¾ cup shredded sharp cheddar during the shaping stage.
Seeded Rustic Bread
Sprinkle sesame, pumpkin, or sunflower seeds over the shaped loaf.
Herb and Parmesan Bread
Add dried Italian herbs and freshly grated Parmesan for a savory variation.
Spicy Jalapeño Bread
Fold diced jalapeños and shredded cheddar into the dough for a flavorful twist.
Serving Suggestions
Warm Buttered Bread
Serve No-Knead Artisan Bread with softened butter and flaky sea salt.
Homemade Tomato Soup
Dip thick slices into creamy tomato soup for a comforting lunch.
Garlic Bread
Brush slices with garlic butter and toast until golden.
For a wholesome and flavorful meal, pair this crusty homemade bread with our Garlic Herb Roasted Veggies – Amazing 40-Minute Side Dish, featuring colorful vegetables roasted with fresh garlic, olive oil, and aromatic herbs until perfectly tender and golden.
Avocado Toast
Top toasted slices with mashed avocado, lemon juice, and black pepper.
Breakfast Eggs
Serve alongside scrambled eggs, omelets, or poached eggs.
Cheese and Charcuterie Board
Pair with cheeses, olives, fresh fruit, and savory spreads.
Family Dinner Side
Serve No-Knead Artisan Bread alongside roasted chicken, pasta, soups, or hearty stews.
For a delicious sweet finish to your homemade family dinner, try our Caramel Flan Dessert Cups – Easy Creamy Individual Flans, featuring silky vanilla custard topped with rich, golden caramel sauce.
Frequently Asked Questions (FAQ)
Why is my no-knead bread dense?
Dense bread may result from insufficient fermentation, too much flour, weak yeast, or excessive handling.
Can I use active dry yeast?
Yes. Use the same measured amount of active dry yeast. It can be mixed into the flour, although fermentation may progress slightly differently.
Do I need bread flour?
No. All-purpose flour works well. Bread flour creates a slightly chewier texture.
Can I make No-Knead Artisan Bread without a Dutch oven?
Yes. Use a preheated baking stone or heavy baking sheet with a separate oven-safe steam source, following appropriate oven safety instructions.
Why is my dough so sticky?
The relatively high water content creates a sticky dough. This is normal and helps produce an airy loaf.
Can I refrigerate the dough overnight?
Yes. After some initial fermentation, refrigerate the covered dough to slow its rise. Allow additional time for proofing before baking.
How do I know when the dough is ready?
It should appear expanded, bubbly, and airy. A dough that has collapsed significantly may have fermented too long.
Why is my bread gummy inside?
Underbaking or slicing before the loaf has cooled can produce a gummy interior.
How should I store homemade bread?
Store completely cooled bread in a bread bag or covered container at room temperature for approximately 2–3 days.
Can I freeze No-Knead Artisan Bread?
Yes. Wrap the cooled loaf or individual slices tightly and freeze for up to three months for best quality.
How can I restore a crispy crust?
Warm the bread in a 350°F (175°C) oven for approximately 8–10 minutes until the crust becomes crisp again.
Nutrition Information
Approximate nutritional values per serving, based on 12 slices without butter or toppings:
| Nutrient | Estimated Amount |
|---|---|
| Calories | 105–115 kcal |
| Protein | 3–4 g |
| Carbohydrates | 22–24 g |
| Total Fat | 0–1 g |
| Saturated Fat | 0 g |
| Dietary Fiber | 0.5–1 g |
| Sugar | Less than 1 g |
| Sodium | 240–300 mg |
Nutrition values are estimates and depend on flour brands, loaf size, and slice thickness.
Final Thoughts
No-Knead Artisan Bread is a wonderful homemade recipe that proves delicious bakery-style bread does not require complicated techniques or expensive ingredients.
With its deeply golden crust, soft interior, and comforting aroma, this rustic loaf is perfect for everyday meals and special gatherings.
The slow fermentation develops flavor naturally, while the Dutch oven creates the ideal baking environment.
Whether served with butter, soup, roasted vegetables, or your favorite sandwich fillings, No-Knead Artisan Bread offers incredible versatility.
For the best results, measure your ingredients carefully, allow sufficient fermentation time, and avoid slicing before cooling.
Save this No-Knead Artisan Bread recipe for your next baking day and enjoy a beautiful, crispy, homemade loaf that’s perfect for sharing with family and friends.