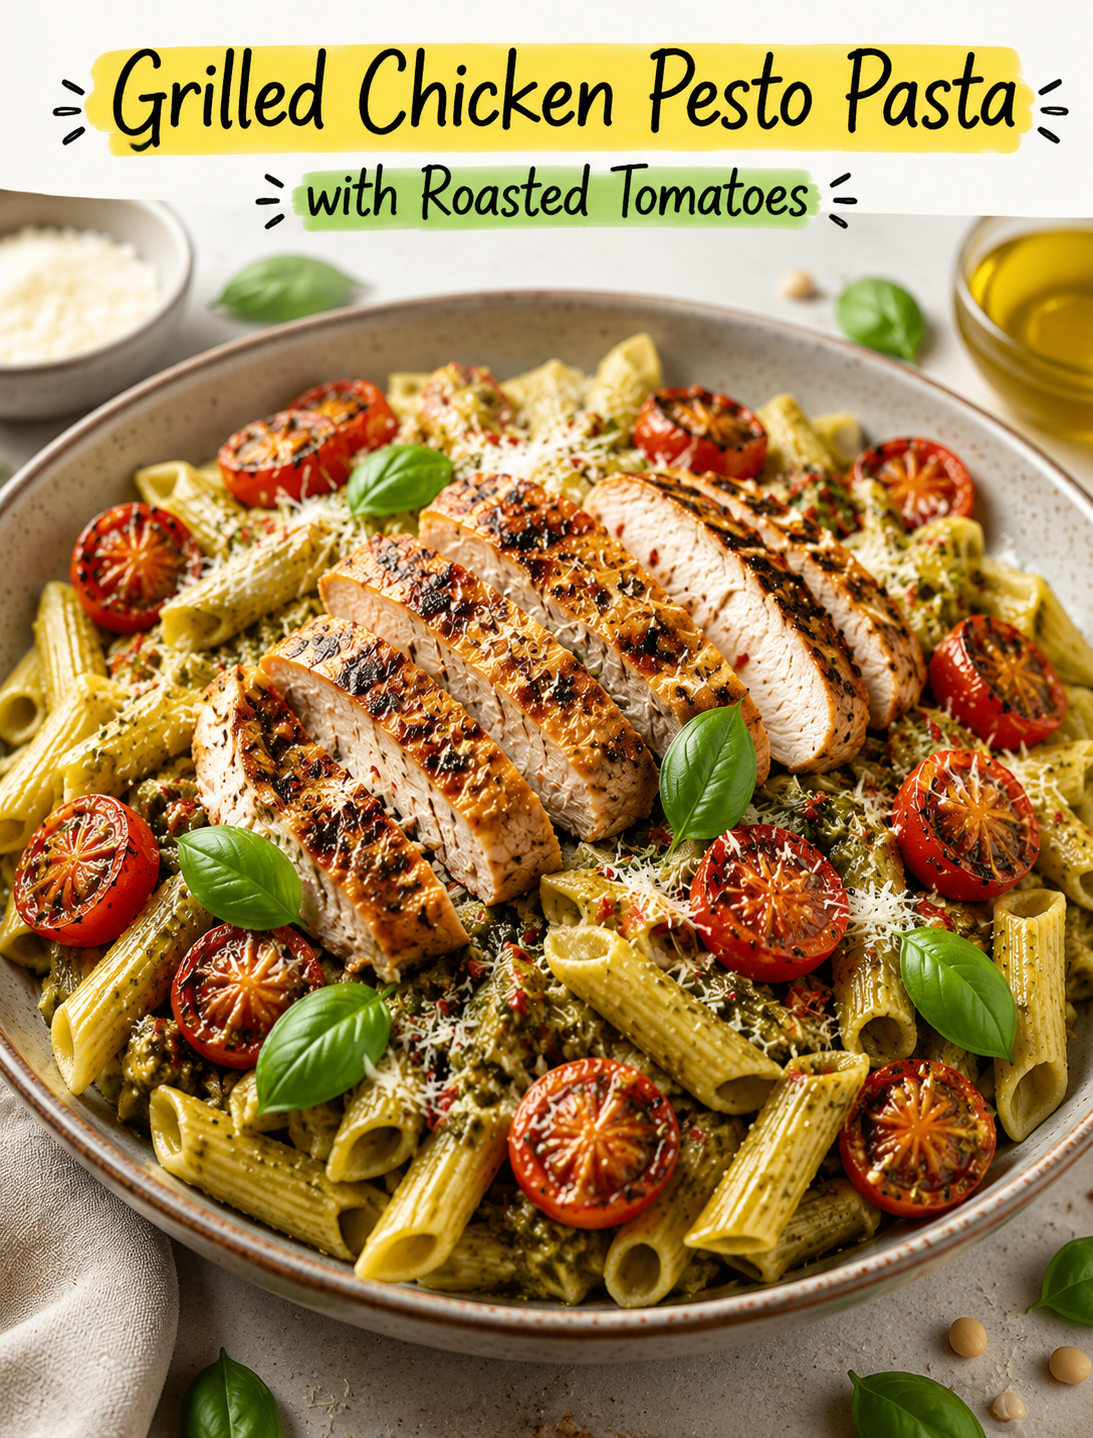
Grilled Chicken Pesto Pasta with Roasted Tomatoes
If you’re looking for a restaurant-quality meal that is surprisingly easy to make at home, Grilled Chicken Pesto Pasta with Roasted Tomatoes is the perfect choice. This comforting pasta dish combines juicy grilled chicken, homemade basil pesto, perfectly roasted cherry tomatoes, and tender pasta into one incredibly satisfying meal. Every bite delivers layers of flavor—from the smoky char of the grilled chicken to the fresh herbal notes of basil pesto and the natural sweetness of oven-roasted tomatoes.
One of the best things about this recipe is its versatility. It works equally well as a quick family dinner, an impressive meal for guests, or a delicious option for meal prep throughout the week. The homemade pesto brings freshness that bottled sauces simply can’t match, while roasting the tomatoes intensifies their sweetness and creates a beautiful contrast with the savory chicken and Parmesan cheese.
Whether you’re a beginner or an experienced home cook, this recipe is simple to follow and produces consistently delicious results.
Preparation Time:
- Prep Time: 10 minutes
- Cook Time: 30 minutes
- Total Time: 40 minutes
Servings: 4
Ingredients:
For the Grilled Chicken
- 2 boneless, skinless chicken breasts
- 1 tablespoon olive oil
- 1 teaspoon garlic powder
- ½ teaspoon salt
- ½ teaspoon black pepper
- ½ teaspoon dried Italian seasoning
- ¼ teaspoon smoked paprika (optional)
For the Pasta
- 12 ounces (340g) penne, fusilli, or spaghetti
- 1 teaspoon salt for boiling water
- Water as needed
For the Homemade Basil Pesto
- 2 cups fresh basil leaves, tightly packed
- ¼ cup pine nuts
- ½ cup freshly grated Parmesan cheese
- 2 garlic cloves
- ½ teaspoon salt
- ½ teaspoon black pepper
- ½ cup extra virgin olive oil
For the Roasted Tomatoes
- 1½ cups cherry tomatoes, halved
- 1 tablespoon olive oil
- ½ teaspoon salt
- ½ teaspoon black pepper
- ½ teaspoon dried oregano
Optional Garnishes
- Fresh basil leaves
- Extra grated Parmesan cheese
- Crushed red pepper flakes
- Toasted pine nuts
- Freshly cracked black pepper
Instructions:
Step 1: Roast the Tomatoes
Begin by preheating your oven to 400°F (200°C).
Wash and dry the cherry tomatoes before cutting them in half. Place them in a mixing bowl and drizzle with olive oil. Sprinkle in the salt, pepper, and dried oregano, then gently toss until every tomato is evenly coated.
Spread the tomatoes cut-side up on a parchment-lined baking sheet, making sure they are arranged in a single layer. Roasting them this way allows the moisture to evaporate while concentrating their natural sweetness.
Roast for approximately 20 minutes, or until the tomatoes are soft, slightly wrinkled, and lightly caramelized around the edges. Remove from the oven and set aside while preparing the remaining ingredients.
Step 2: Prepare the Chicken
Pat the chicken breasts dry using paper towels. Dry chicken develops a better sear and more attractive grill marks.
Rub each chicken breast with olive oil, ensuring the surface is evenly coated. Mix together the garlic powder, salt, black pepper, Italian seasoning, and smoked paprika before rubbing the seasoning mixture over both sides of the chicken.
Allow the chicken to rest at room temperature for about 10 minutes while the grill heats.
Preheat a grill or grill pan over medium-high heat. Once hot, place the chicken on the grill without moving it for the first several minutes to create beautiful grill marks.
Grill each side for approximately 5–7 minutes, depending on thickness, until the internal temperature reaches 165°F (75°C).
Transfer the cooked chicken to a cutting board and allow it to rest for five minutes before slicing. Resting helps keep the juices inside the meat, resulting in tender and flavorful chicken.
Slice into thin strips or bite-sized pieces.
Step 3: Cook the Pasta
Bring a large pot of water to a rolling boil.
Add the salt before adding the pasta. Properly salted water enhances the flavor of the pasta from the inside.
Cook according to the package directions until the pasta reaches an al dente texture—firm yet tender.
Before draining, reserve about ½ cup of the pasta cooking water. This starchy liquid helps loosen the pesto and creates a silky sauce later.
Drain the pasta but do not rinse it, as the natural starch helps the pesto cling to every piece.
Step 4: Make the Homemade Pesto
While the pasta cooks, prepare the pesto.
In a food processor, combine the basil leaves, pine nuts, Parmesan cheese, garlic cloves, salt, and black pepper.
Pulse several times until the ingredients become finely chopped.
With the processor running, slowly drizzle in the olive oil until the mixture becomes smooth and creamy.
Taste the pesto and adjust the seasoning if needed. If you’d like a brighter flavor, add a squeeze of fresh lemon juice.
The finished pesto should be rich, aromatic, and vibrant green.
Step 5: Assemble the Pasta
Transfer the warm drained pasta to a large serving bowl.
Add the freshly made pesto and gently toss until every piece of pasta is coated.
If the sauce appears too thick, gradually stir in the reserved pasta water, one tablespoon at a time, until the desired consistency is reached.
Fold in the roasted tomatoes, taking care not to crush them too much. Their juices naturally blend into the pesto, adding even more flavor.
Add the sliced grilled chicken and gently toss once more until everything is evenly combined.
Serve immediately while warm.
Finish with freshly grated Parmesan cheese, basil leaves, toasted pine nuts, and crushed red pepper flakes if desired.
Chef’s Tips:
- Fresh basil produces the brightest pesto flavor.
- Avoid overcooking the chicken to keep it juicy.
- Always reserve pasta water before draining.
- Freshly grated Parmesan melts more smoothly than pre-shredded cheese.
- Roast the tomatoes until lightly caramelized for maximum sweetness.
- Let grilled chicken rest before slicing.
- Use quality extra virgin olive oil for the richest pesto.
- Toss the pasta while it’s still warm so it absorbs the sauce better.
Variations:
Creamy Version
Stir in ¼ cup heavy cream or mascarpone cheese for a richer sauce.
Spicy Version
Add extra red pepper flakes or diced fresh chili peppers.
Mediterranean Style
Mix in sliced olives, artichoke hearts, spinach, and crumbled feta cheese.
Seafood Version
Replace the grilled chicken with grilled shrimp or salmon.
Vegetarian Option
Use roasted chickpeas, grilled tofu, or sautéed mushrooms instead of chicken.
Storage Instructions:
Allow leftovers to cool completely before transferring them to an airtight container.
Refrigerate for up to 3 days.
For best results, reheat gently in a skillet over medium-low heat with a splash of water or chicken broth to loosen the pesto sauce.
Freezing is not recommended because fresh basil pesto can lose its vibrant color and texture after thawing.
Serving Suggestions:
This pasta pairs beautifully with:
- Garlic bread
- Caesar salad
- Mixed green salad
- Roasted asparagus
- Grilled zucchini
- Garlic roasted broccoli
- Bruschetta
- Sparkling lemonade
- Fresh iced tea
Nutritional Information (Per Serving):
- Calories: 550 kcal
- Protein: 40g
- Carbohydrates: 50g
- Fat: 25g
- Saturated Fat: 5g
- Fiber: 4g
- Sugar: 5g
- Sodium: 450mg
- Cholesterol: 85mg
- Calcium: 220mg
- Iron: 3mg
- Potassium: 620mg
Frequently Asked Questions:
Can I use store-bought pesto?
Yes. Homemade pesto offers the freshest flavor, but a good-quality store-bought pesto works well if you’re short on time.
Which pasta works best?
Penne, fusilli, farfalle, rigatoni, and spaghetti are all excellent choices. Pasta with ridges or twists holds the pesto especially well.
Can I prepare this ahead of time?
Absolutely. Grill the chicken, roast the tomatoes, and make the pesto a day in advance. Store them separately in the refrigerator and cook the pasta fresh before serving for the best texture.
Can I make this gluten-free?
Yes. Simply substitute your favorite gluten-free pasta while keeping all the other ingredients the same.
What can I substitute for pine nuts?
Walnuts, almonds, pecans, pistachios, or sunflower seeds all make delicious alternatives while maintaining a rich, nutty pesto flavor.
How do I know when the chicken is fully cooked?
Use an instant-read thermometer to check that the thickest part of the chicken reaches 165°F (75°C). This ensures the chicken is safe to eat while remaining tender and juicy.
Can I serve this cold?
Yes. This recipe also makes an excellent pasta salad. Allow it to cool, then refrigerate for a couple of hours before serving. The flavors continue to develop, making it perfect for picnics, potlucks, and meal-prep lunches.